Friday, November 27, 2015

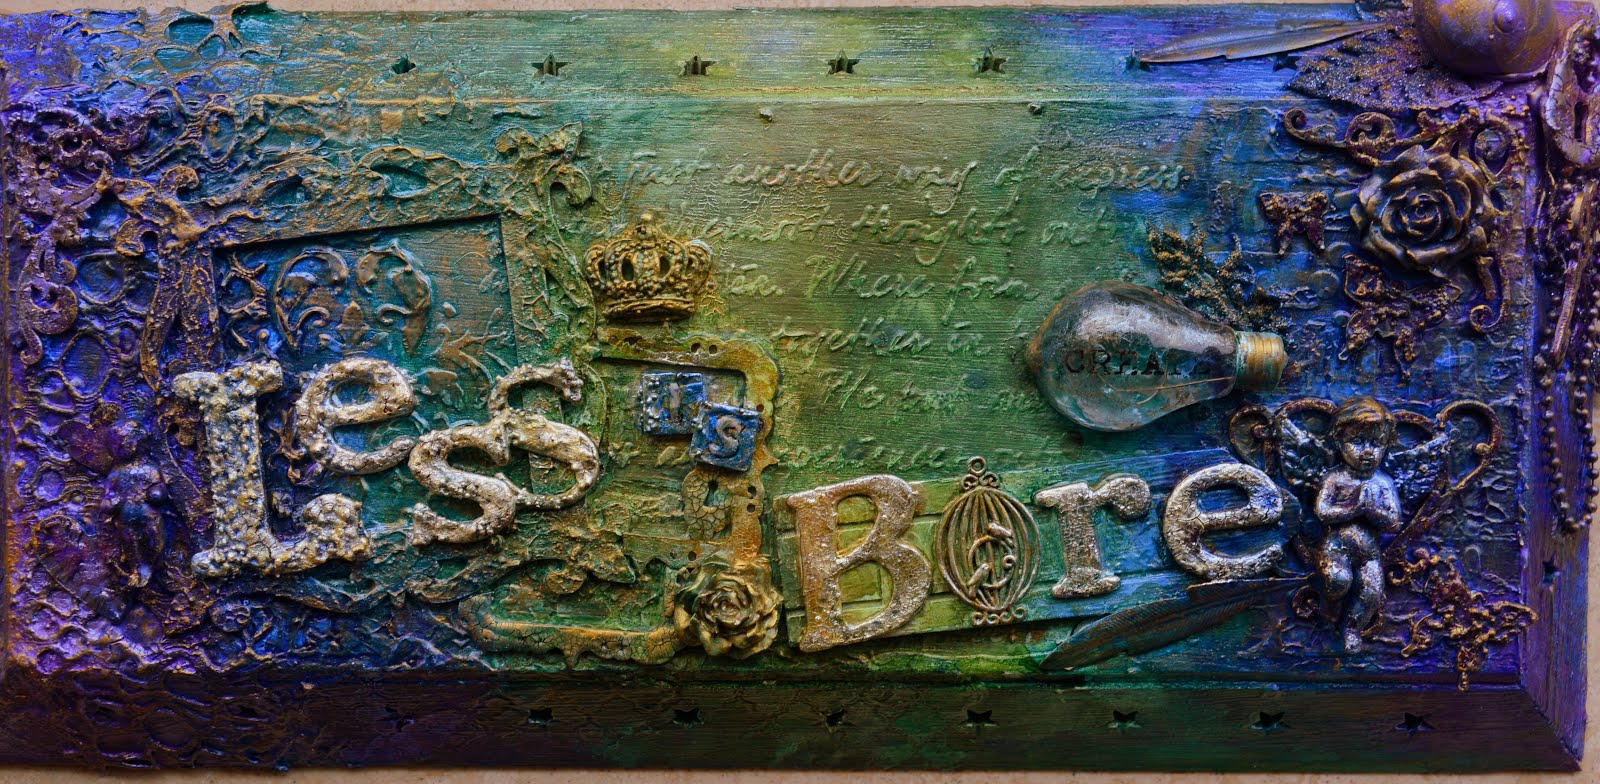
"Less is Bore!" Mixed media tray (canvas)


Follow me on facebook! "Less is bore!"

Hi all! 
Because I felt that my blog needed an actual scrapped banner instead of the digital one I had, I made my own in a Finnabair mixed media style. 
A wooden tray was all I could find in the desired size. I turned it upside down though, which seemed easier for stenciling. 
First, I coated the tray with white gesso. Adhered a piece of 'open' ribbon to the left and then stenciled different stencils using modelling paste. I stenciled the 'art is..' text, some bricks, a church window and damask.
The wooden frame was covered with a mix of modeling paste and '13 arts magic powder'. I added this a bit on the left corners too, to make the transition from the ribbon to the background more smooth.
Unfortunately it didn't provide me with the crackle texture it should have. Need some practising with it, obviously. 


When that had dried I added some more frames, embellishments and letters. Covered everything in gesso. Multiple layers on the colored letters.


When that had all dried I decided the top right corner needed more embellishing. Covered those in gesso too.
For more structure I added glass beads texture gel on some things and crackle paint on others.


I let it dry and added several different colors of mists. I used some Lindy's, Dylusions, Tattered Angels; whichever colour suited my idea. In between colours I dried with my heatgun! 


After the first session of spraying I wasn't very pleased so I added another colour and just kept changing things until I was happy. 


When I was finished I rubbed some golden colored Inka Gold on every single part that stood out or was textured.

I added some more crackle medium on the letters and some embellishments. The sometimes multiple layers of different colours mist provided me with some lovely, surprising effects!

Later I used a cream colored Inka Gold on my letters because they didn't stand out enough, as you can see in the picture above. 

I'll leave you with some close-ups. I'd love to hear what you think! And I'm always happy to answer your questions!

Happy scrapping! :)


Friday, November 20, 2015

Mixed media canvas, "Leaves" challenge by Scrapki wyzwaniowo

Hiya there, 
Hope you're having weekend already, like me :)
I had some recent fall pictures of my boy Connor that I wanted to scrap, and I saw the november challenge over Scrapki Wyzwaniowo! The challenge is 'leaves'. You can still join in, so go on over there and have a look!
Because this particular layout will be a gift, I glued it to a canvas. Which gave me the opportunity to use much thicker embellishments, yay!
Connor shows it right here :)


I started out with this piece of paper from Kaisercraft in currogated cardboard look. With my big foam tree stamp I stamped a tree with brown Tim Holtz distress embossing powder.


Honestly I started embellishing after this already, but I should probably pretend to tell you that I did some stamping next with a text stamp and brown ink.
I splattered some ink sprays all over the page. A very wrong red one too. Which turned my sweet forest scene into a forest massacre... :'( 
Managed to fix that up some by smearing some Inka Gold copper over those particular areas. In retrospective I wouldn't have splattered so much because it takes away from the total design. In my opinion. But if you have a different opinion I'd be glad to hear it ;)


Basically I used a lot of leaves... Even metal ones. The words/sentences (one is from 'scrapiniec') are painted with Tim Holtz copper crackle paint.
I added a little wooden fox, mushrooms, some slices of wood, a bird, some acorns.


Thanx for reading and commenting! Happy scrapping! 


Monday, November 9, 2015

Mixed media layout "No one else will ever know the strength of my love for you..."

Hiya fans :P

Had the chance to scrap another layout this weekend. And this one is sooo sweet, it'll hurt your teeth... 
Ready? Set... Go!


Here's a close-up so you can see the quote I used. "No one else will ever know the strength of my love for you. After all, you're the only one who knows what my heart sounds like on the inside."
I typed that myself on an old typewriter. Mounted the quote onto a wooden frame, which I coloured purple with Inka Gold. Then I covered both frame and text with one step crackle medium. (Way thicker on the frame ofcourse, I needed my quote to remain visible! So I brushed that area thinly.) Patience is the key here, do not try to speed the crackle process up with your heatgun, because you'll end up with broken bubbles.
So, once dry I inked it with some aqua ink.


You also see part of the angel's wing I stenciled. I used glass bead texture gel mixed with a pearl medium. The tiny butterflies are mirrors, which I gave a layer of pearl alcohol inkt first, and afterwards I covered them with glass beads texture gel.

The blue heart you see peeking out from underneath it all was also a mirror. I gave that a coat of the same mixture I used to stencil my big damask swirl with. A blend of crackle paste and an aqua blue Dylusion spray ink/mist. In my opinion the paste didn't crackle as much as I hoped for. But the stencil was hard to handle because it was so big and I didn't want to risk smearing too much in unwanted places, so.


I used modelling paste to stencil the text on the top left and bottom right. Afterwards I sprayed and inked those parts, as well as the rest of the page lightly here and there, with lilac and blue. 
Almost forgot to mention that I practically distress every page I do, by tearing up the edges and sides with a
 special tool. I ink the sides too.

The flower wreath is a piece meant for home decor. I bent it into a heart shape and added blue flowers to the existing pink ones.

I suppose that's all there really is to it! Let me know if you want to learn more. Comments are always very welcome.

Happy scrapping! 

Sunday, November 8, 2015

"Cute" Mixed media layout

Hi all,

It's time for another update already. This next layout was a simpler one for me.
I had a small and normal sized picture of Connor wearing a brown and blue striped hat, really showing off the intense blue eye colour he used to have back then. 
The paper I wanted to use was light and dark blue. So I started by colouring the bottom piece brown. With a Lindy's Stamp Gang ink spray and a regular ink cubicle.

First I figured out where I wanted my pictures, then I stenciled the feathers with a brownish Inka Gold. I've said it many times, I know, but I looooove my Inka Golds. They're pleasant to work with, nice and creamy, and the result is always sharp and shiny.


So this is what my page looks like after stenciling the feathers.


After the stenciling I decided to add a little stamping in brown and blue, with some brick and wood like patterns.

Then it was embellishing time! A few ribbons here and there, a few words I sprayed with London Blue Dylusions Ink. Some felt circles, real feathers and other small knick knacks. An owl I secretly wrecked because I wasn't patient enough. (Do not speed up crackle paint by drying it with your heatgun. It will only bubble, not crack. Also don't spray it with spray ink before it's dry. You'll have no control over the end result. Which is why I hid most of my owl with feathers, LOL.)


Here's a small close up that'll hopefully show you how well the Inka Gold feathers turned out.


Let me know what you think! Questions and comments are always welcome!
Happy scrapping!

Saturday, November 7, 2015

"Butterfly Kisses" Mixed Media layout

Hey all,

As promised im back to show you my latest layout. It's called "Butterfly Kisses". On the picture my boy Connor is 3 weeks old and being kissed by his nephew.


I didn't take step by step pictures because I didn't have my phone with me. Also, it's a good thing I didn't because my initial idea went horribly wrong. 
The paper is by 7Dots, Nature Walk. For some time already I had sought out the backside of this particular paper to scrap with this picture. The backside was black with a sandy coloured swirl. Very pretty. I wanted to use the Prima Finnabair doilie stencil with black gesso to begin with. 
So I tried. Upon removing the stencil I had one big, black blob :'( I decided to smear out the black gesso but that was horrendous. So I decided to flip the paper over and work from there. Strange enough it all came together rather quickly after this debacle! 

I glued some strips of old sheet music to the paper with gel medium and dried them. Afterwards I  wiped some white gesso over them because they were too yellow.
I stenciled my doilie with black PAINT instead of GESSO :P
I stamped the border swirls and parts of a text stamp with black ink. 
Tried out my glass beads texture gel and crackle paint and crackle paste on the wooden chalk tags. And later on almost every other surface ;)

Layered the picture on a piece of blue patterned paper and some cardstock. Added the blue denim rose ribbon, which I coloured partially with black mist. 


I guess that's about it! The picture above shows some of the materials I've used. If you have any questions or comments, please dont hesitate to leave me a reply.

Happy scrapping!