Hey everyone!
The Canvas Corp Crew had a challenge I gladly accepted: make something using spring colors, English Garden style. And I have been lucky enough to have this canvas featured on their blog!
Luckily I still had the most adorable picture of Connor, that simply screamed 'spring'! This picture takes me back instantly to those lazy, sunny days we spent at our in-laws, in their beautiful, huge, grassy garden. Thinking back still warms me on the inside.
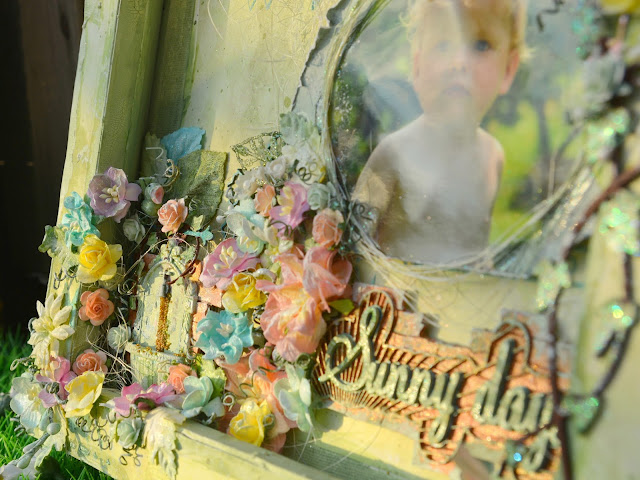
So here's my 'Sunny Days' canvas! I'll talk you through the steps with pictures underneath.
Obviously, I started out with a 12 by 12 inch (30 by 30 cm) canvas. The paper is from the 7Gypsies 'Take our breath away' collection. I cut off the edge to fit the outline of my (reversed) canvas. I glued the outer 'frame' and the inner section to the canvas.
The transitions from paper to canvas and some of the wooden parts of the canvas were covered in white gesso.
I covered the sides of the canvas (and some other bits here and there) with my recently bought Art Extravaganca White Crackle Texture paste. If you're a regular reader you might have heard my experience with the Golden Crackle Paste hasn't been good. But this texture paste works like a dream. It dries quickly and actually cracks. Period.
I let the gesso and texture paste air dry for some time and then I brushed some glimmermist Olive Vine all over the sides. Yes, I dipped my brush into the bottle. Later on I splattered some droplets over my canvas as well.
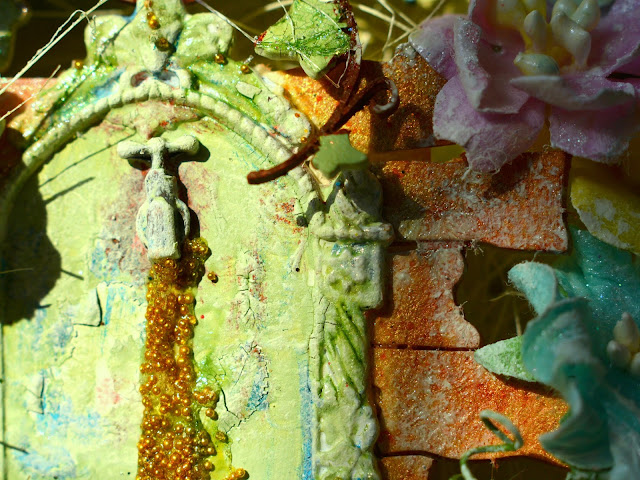
Using 2 masks I created a gate and some diamond patterns on my page. I mixed modeling paste with Verdigris glimmermist and applied my mixture through the stencil using a plastic card. I didn't remove the stencil immediately, but sprayed on some Olive Vine glimmermist. This turned out better than I had hoped: the colors blended smoothly and the pattern slightly repeated outside the spot I had done with modeling paste. If you haven't tried this before, you should!
Finally I had a reason to use my gorgeous Dusty Attic chipboard vines... To color the leaves I mixed the white crackle paste with Olive Vine glimmermist and got a nice, soft green color. Once this had dried, I dabbed on some more of the Olive Vine glimmermist, to enhance the cracks and give the leaves a deeper green color.
Another score from the craft fair that my sis in law Laneen (you should totally check out her blog too! Laneen's Journey Through Creativity ) and I visited February 20: Rusty Paper.
The twigs needed a brownish, textured coat, so I figured: why not? And I really like the effect!
Almost forgot to mention that I painted the 'poles' with the Emerald Finnabair Metallique Paint.
This really had the texture I was hoping for: like Hammerite. (The paint people use outdoors and has a grainy structure.)
The wash basin is from Prima Marketing (another embellishment waiting to be used on a special project) and I aged it by applying almost all of the blends and paints I used on this project, onto it. However, the coat of white gesso I dabbed onto it afterwards, really did the trick. Everything blended together better.
The 'Sunny days' chipboard is from Scrapiniec and built up in layers. I covered the 'stripy' parts with Golden Goddess Glimmer Glam. The top part of the text was done with the crackle paste/glimmermist mixture, and also dabbed on with glimmermist afterwards. The text underneath was painted with Finnabair's Emerald Green Metallique paint.
The pieces of stone (chipboard) were coated with an orange/pink metallic paint first, then I painted the Golden Goddess Glimmer Glam over them.
Later I dabbed some Olive Vine glimmermist around the edges too, mimicking moss.
Okay, with most of the chipboards altered and the background ready, the time had come to play with placement. Time to break out my flower collection. I added a little at first, and then I added some more. And then even more. And then still some more, until the composition felt right.
To the background I glued some bits of off-white sisal. I made a circular 'wreath' around Connor's picture with the sisal as well. The parts protruding from the circle were dabbed in gesso mixed with a little glimmermist. Also, I ripped some pieces of the picture because in retrospective, a completely circular picture might have been more pleasing to the eye.
When all the flowers, chipboard and embellishments were in place, I dabbed everything with white gesso, using a foam brush.
When that had dried, I coated everything with Chandelier Glimmer Glam. I am not sure whether the white spots came from the glimmer glam or from the gesso, but it doesn't matter, because I LOVE it! It was like a glittery, jummy, edible snow all over my project! (Without looking too snowy, because it made it all look like candy. Delicious, fun candy. Cotton Candy.)
I will leave you with plenty of more pictures and close-ups to soak up the feeling of spring yourself. Comments are always welcome, as are questions.
You can also find me on facebook: Less is Bore!
Or Instagram.
Happy scrapping!


2 comments:
Wow what a gorgeous and sweet color full layout. Love it a lot.
Thank you sweet Laneen ♡ It was a true joy creating this.
Post a Comment