Showing posts with label modeling paste. Show all posts

Wednesday, March 15, 2017

Words & Paintery March Challenge Mixed Media Layout "Enjoy Summer"


Hi all,

Time for a new challenge over at Words & Paintery!
The beautiful blues and mint combo spoke to me immediately.
You can find the challenge HERE.
You have until April 15 to come up with your entry, so please join us!

--------------------------------------------------------------------------------------

Start with your background paper and cover it in clear gesso.
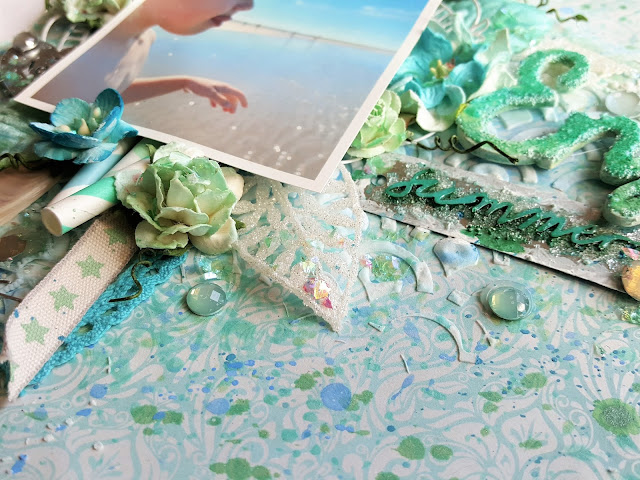
This sheet is from the budget store called Action. This beach photo from last year's Summer Holiday came to mind with these colors. We really enjoyed ourselves at the Dutch beach during those hot Summer days. Connor loved the sand and sea.


Use the 12 by 12 Prima stencil with scales and apply TCW Light & Fluffy modeling paste through it. Use your heatgun to make it puffy.


Do the same with this bubbly stencil. (I think it's by Dutch Doobadoo)


First spray water on your layout, then drip and brush various shades of Tattered Angels glimmer mist over the stenciled areas. Splatter more, following the outlines of the stenciled parts.
The colors Tattered Angels Glimmer Mist I used for this project are:
Mint Julip - True Turquoise and Chalkboard Splash


This wood word 'Enjoy' is from Wibra. Cover it with TCW Gel Medium and 13 Arts glass filler. Then use various shades of the Tattered Angels Glimmermists mentioned above. Dab some white gesso on it and add a layer of mod podge.
'Summer' is a Scrapiniec chipboard, colored with Glimmer Mist and Mod Podge as well.

Add straws underneath the picture and staple them into place. Attach some ribbons, flowers and leaves. Color everything that isn't just right with Tattered Angels Glimmer Mist, or mellow it down with white gesso. Add Prima Crystals.


These long sea shells are actually souvenirs from the same vacation the photo of Connor was taken.


Add mint colored mica flakes with gel medium over certain areas of your page.


Using your diecut machine and the waffle flower die, cut 2 of them from white paper. Cut them both up and attach 2 halves underneath the picture. Attach the other halves on the top and bottom of the right side of the page.


I hope you enjoyed my take on the challenge, and look forward to your entry!
Comments and questions are always welcome!
Find me on Facebook: lessisbore
And Instagram: mandylessisbore

HAPPY SCRAPPING!


Tuesday, May 24, 2016

Mixed media canvas "Lights will guide us home" May Challenge 'Words & Paintery' blog


Hi all!

Remember me winning the March Words & Paintery challenge with my altered fan? 
Because of that I was asked as a feature for their May challenge! You can check out their post here.
You'll find a little more info on me there as well, in case you're interested.
Secretly I have been working on my canvas using their brand new color scheme. You are so welcome to join them, the challenge is open until June 15!
Check it out here:
Words & Paintery May challenge


Those jummy and fresh colors spoke to me immediately! The quote however, gave me some trouble. Until I came up with the perfect idea...
Last Summer we spent our holidays in England, again. My husband and I love England. Only this time we brought our son for the first time (and my dad too) to share our love for England with them! This was even Connors first holiday/vacation ever.

The picture I used was taken on the boat on our way back, from Dover to Calais. Obviously the lights that will guide us home are the lighthouses and other coastal lights. Which is why I used a lighthouse on my canvas as well.

For starters I glued a paper to a canvas. The paper is from 13 Arts and is called 'Faces of Spring/In your eyes'. 
Then I applied Tattered Angels Glimmerglam 'Tailfin' mixed with gesso through a compass stencil to emphasise the 'way home'. Once dry I added some more of the same Glimmerglam. 
Through the Tim Holtz swirls stencil I used Art Alchemy Acrylic Paint Opal Magic 'pinkblue' mixed with 13 Arts 'Magic Powder' to thicken it.


Through a damask stencil I used modeling paste blended with Tattered Angels glimmermist 'Pink Poodle'. Love the razor sharp voluminous result!


Once dry I sprayed a little more of the Tattered Angels 'Pink Poodle' glimmermist over the damask patterns and a little on the paper here and there.
Stamped some rope with knots with black ink on the page.


On the spot I had thought my picture, I glued some bandage/gauche with gel medium and added Finnabair 'Artstones' in different sizes. I covered most of it with white gesso, mimicking sea foam. 


Around the edges, in the corners and on the sides of the canvas I added Prima Crackle Paste, allowing it to dry overnight. Colored the crackle paste with some Lindy's Stampgang 'Mad Hatter Mint' and Tattered Angels Glimmerglam 'Tailfin'. Same goes for the gesso'ed parts on the bandage.

I'll explain some more underneath the pictures of the finished result.


Sprayed some glimmermist on the ribbon, crumpled it and let it dry. The big blue rose was handmade by my sweet friend Jetty.
 The blue berries and twigs are from 13 Arts. The little bottle was filled with 13 Arts 'glass filler beads small'.


The chipboard letters and word are covered with gesso, Art Alchemy Acrylic Paint Opal Magic 'pinkblue' and 'bluegold', some Tattered Angels Glimmerglam 'Tailfin' and 13 Arts 'glass filler beads small'.
The steering wheel roughly got the same treatment after receiving a layer of Prima 'crackle paste' first.
The space in between is filled up with Prima Finnabair Art Pebbles in different sizes, 13 Arts 'glass filler beads small', Prima 'Artstones' and some glass balls. All was colored with Tattered Angels Glimmerglam 'Tailfin' after the gel medium dried.


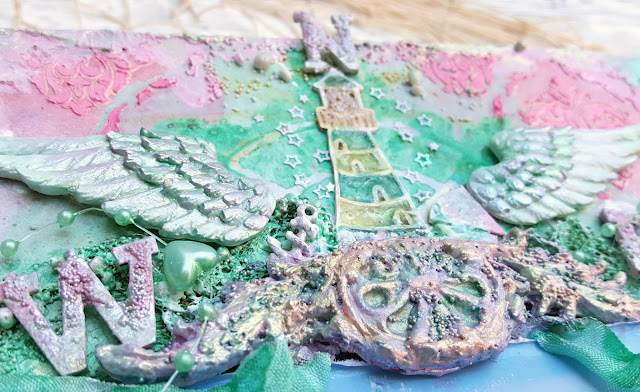
The chipboard lighthouse is Scrapiniec, the wings are plaster and the ornament is done with a new Prima IOD baroque mold and clay.
  Filled the lighthouse up with mod podge I blended in two tones, one gold and the other mint.
 The wings are coated with Art Alchemy Acrylic Paint Opal magic 'bluegold' and brushed of with a bit of pink.
The ornament got a layer of gesso and some small art stones, the A whole bunch of different shades because I just didn't like the result. I tried Prima Mica Powder Opal magic blue and green first. Then some of Prima's Opal Magic paints, some glimmermist, some gesso, you get the picture ;) 
Just paint and play until you like the result!


Sticking to the maritime theme and our journey on the boat, my canvas needed a little boat too of course. I thought it would be fun to have some little cherubs in the boat, whispering a little secret. The secret is that they're carrying with them one of the compasses letters: 'S' for South.


Filling up the space around the picture I added shells, bits of straws, flowers, leaves, branches, chipboard, charms, etc. I wrapped some beaded string with hearts through the embellished parts. When all was in place I painted it with Tattered Angels Glimmerglam 'Chandelier'.

That's it. I think. Took me quite some time to finish this one up because I kept missing and thus adding stuff ;)
Comments and questions are always very welcome!
Find me on Facebook too: Less is bore!
And Instagram: mandylessisbore

Happy scrapping!


Thursday, March 24, 2016

"Sunny Days" Mixed Media canvas

Hey everyone!

The Canvas Corp Crew had a challenge I gladly accepted: make something using spring colors, English Garden style. And I have been lucky enough to have this canvas featured on their blog! 

Luckily I still had the most adorable picture of Connor, that simply screamed 'spring'! This picture takes me back instantly to those lazy, sunny days we spent at our in-laws, in their beautiful, huge, grassy garden. Thinking back still warms me on the inside.

So here's my 'Sunny Days' canvas! I'll talk you through the steps with pictures underneath.


Obviously, I started out with a 12 by 12 inch (30 by 30 cm) canvas. The paper is from the 7Gypsies 'Take our breath away' collection. I cut off the edge to fit the outline of my (reversed) canvas. I glued the outer 'frame' and the inner section to the canvas.


The transitions from paper to canvas and some of the wooden parts of the canvas were covered in white gesso. 
I covered the sides of the canvas (and some other bits here and there) with my recently bought Art Extravaganca White Crackle Texture paste. If you're a regular reader you might have heard my experience with the Golden Crackle Paste hasn't been good. But this texture paste works like a dream. It dries quickly and actually cracks. Period.
I let the gesso and texture paste air dry for some time and then I brushed some glimmermist Olive Vine all over the sides. Yes, I dipped my brush into the bottle. Later on I splattered some droplets over my canvas as well.


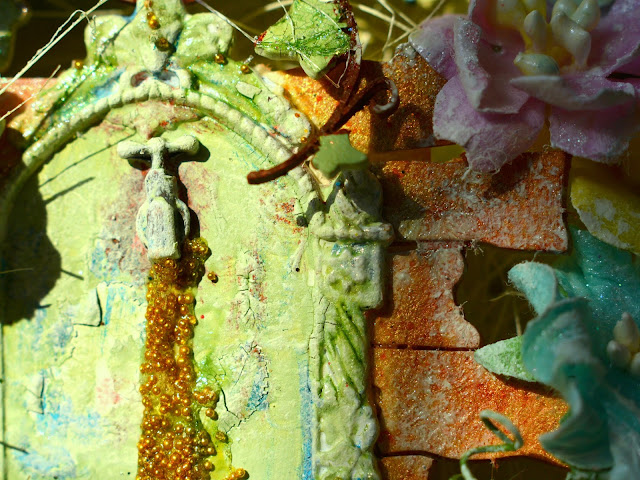
Using 2 masks I created a gate and some diamond patterns on my page. I mixed modeling paste with Verdigris glimmermist and applied my mixture through the stencil using a plastic card. I didn't remove the stencil immediately, but sprayed on some Olive Vine glimmermist. This turned out better than I had hoped: the colors blended smoothly and the pattern slightly repeated outside the spot I had done with modeling paste. If you haven't tried this before, you should!


Finally I had a reason to use my gorgeous Dusty Attic chipboard vines... To color the leaves I mixed the white crackle paste with Olive Vine glimmermist and got a nice, soft green color. Once this had dried, I dabbed on some more of the Olive Vine glimmermist, to enhance the cracks and give the leaves a deeper green color.


Another score from the craft fair that my sis in law Laneen (you should totally check out her blog too! Laneen's Journey Through Creativity ) and I visited February 20: Rusty Paper.
The twigs needed a brownish, textured coat, so I figured: why not? And I really like the effect!
Almost forgot to mention that I painted the 'poles' with the Emerald  Finnabair Metallique Paint.
This really had the texture I was hoping for: like Hammerite. (The paint people use outdoors and has a grainy structure.)
The wash basin is from Prima Marketing (another embellishment waiting to be used on a special project) and I aged it by applying almost all of the blends and paints I used on this project, onto it. However, the coat of white gesso I dabbed onto it afterwards, really did the trick. Everything blended together better.


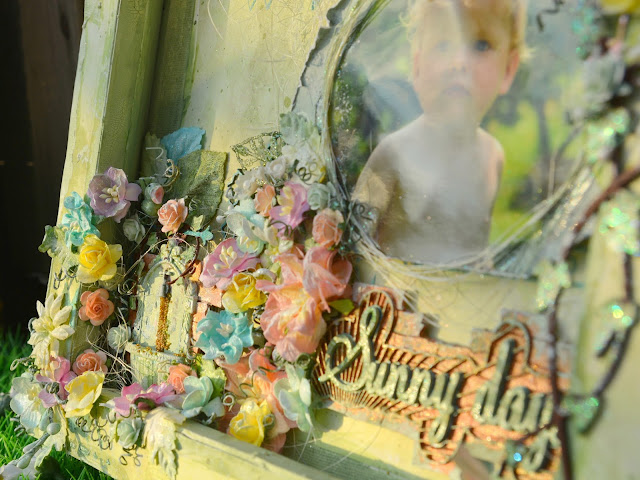
The 'Sunny days' chipboard is from Scrapiniec and built up in layers. I covered the 'stripy' parts with Golden Goddess Glimmer Glam. The top part of the text was done with the crackle paste/glimmermist mixture, and also dabbed on with glimmermist afterwards. The text underneath was painted with Finnabair's Emerald Green Metallique paint.

The pieces of stone (chipboard) were coated with an orange/pink metallic paint first, then I painted the Golden Goddess Glimmer Glam over them.
Later I dabbed some Olive Vine glimmermist around the edges too, mimicking moss.


Okay, with most of the chipboards altered and the background ready, the time had come to play with placement. Time to break out my flower collection. I added a little at first, and then I added some more. And then even more. And then still some more, until the composition felt right.

To the background I glued some bits of off-white sisal. I made a circular 'wreath' around Connor's picture with the sisal as well. The parts protruding from the circle were dabbed in gesso mixed with a little glimmermist. Also, I ripped some pieces of the picture because in retrospective, a completely circular picture might have been more pleasing to the eye.

When all the flowers, chipboard and embellishments were in place, I dabbed everything with white gesso, using a foam brush.
When that had dried, I coated everything with Chandelier Glimmer Glam. I am not sure whether the white spots came from the glimmer glam or from the gesso, but it doesn't matter, because I LOVE it! It was like a glittery, jummy, edible snow all over my project! (Without looking too snowy, because it made it all look like candy. Delicious, fun candy. Cotton Candy.)

I will leave you with plenty of more pictures and close-ups to soak up the feeling of spring yourself. Comments are always welcome, as are questions.
You can also find me on facebook: Less is Bore!
Or Instagram.

Happy scrapping!